السلام عليكم Finally, I'm here again, typing new things heh. The only different thing this time is that this is not a mere post like before ones. I'll be writing a photoshop tutorial. It's just a remake though. Nothing to be proud of. Nevertheless, it's my very first one to be published. Actually, this is the consequence when one of those peaceful days of my life have been destroyed by Leo haha.
He buzzed me on YM, urging me to show him the true path of doing
one of the tutorials on Abduzzedo XD. Maybe it wasn't clear enough for him. Nevermind. It was an
Abduzeedo's reader's tutorial. Some kind of typography. Credits to them. By the moment I write this, I haven't yet asked for their permission. Should I? Heh. Without much ado, let's begin. Leo, I hope this is clear enough for you.
Step 1
Create a new canvas with a black BG colour. In a much simpler language, create a new project. (CTRL + N). In the original tutorial, he says the size of 1200 x 800 pixels. Well, that's a wallpaper resolution, I suppose. Nevertheless, I won't be doing this with that or I will ended up having my system working a bit slower. (Yeah, dummy oldy buddy) Hence, I choose 600 x 500 pixels.
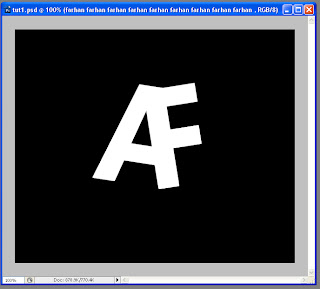
Then, you should have a shape for your design in your canvas. I'll just use a simple one, AF, due to the laziness of creating a complex one XD. It's up to you though. Be creative.
 Step 2
Now, hide that by clicking on the EYE thing which is the next to your layer in the layer pallete. Then, create a text box and start typing your text in it, filling all empty spaces. In this case, I just typed my name hehe. For the text setting, I use Segoe UI Bold 9pt #404040.
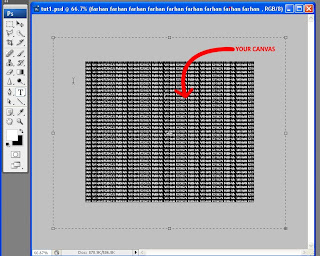
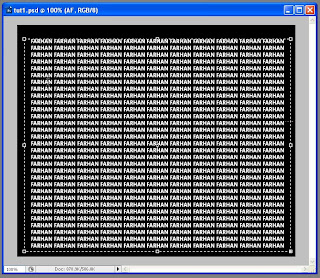 That's not enough yet. You now need to resize the text box using text tool until it's bigger than your canvas size.
 Step 3
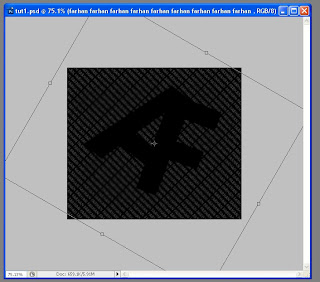
Allright. The next thing to do is rotate the text box. About 45 degree will do just fine. However, this step is optional. If you don't feel like having the text slanting, don't do this then.
 Step 4
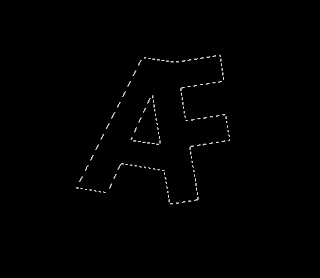
Next, unhide your smart object (the shape that mentioned on the 1st step). Then, make a selection by pressing CTRL and click on the thumbnail of your smart object. It's in you layer pallete. Marching ants (or something) of the selection will then appear around the edges your object.
 Step 5
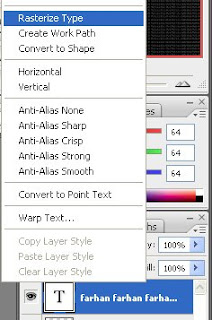
To see your object's selection clearer, hide the object layer again. Then, remember to rasterize your text layer.
 Step 6
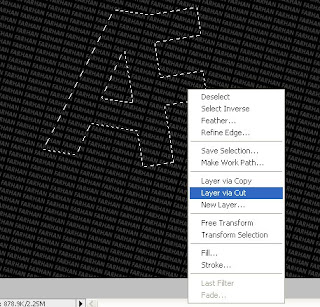
Select your marquee selection tool . Make sure your text layer is selected. Right click and then select layer via cut. You'll now have a new layer, with your text cut via the shape you just selected.
 Step 7
You now can apply some layer style for the new layer. Colour overlay or something. Or you might want to refer to the original tutorial.
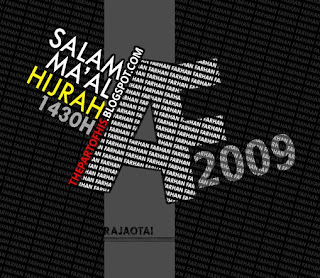
Okay, that's it. For the complete tutorial, why don't you view it here? I'll just stop here hehe. I added some elements for the final result. And it turns out like this.
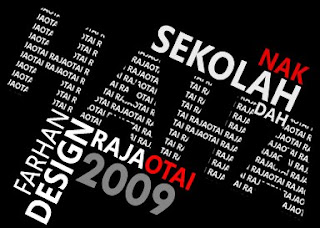 p.s : I don't think that this is quite helpful -.-"
p.s.s : I've downloaded Dark Knight's OST. Suspense music, all of them! Bose
p.s.s.s : I made up the title of this post


 Step 2
 That's not enough yet. You now need to resize the text box using text tool until it's bigger than your canvas size.
 Step 3
 Step 4
 Step 5
 Step 6
 Step 7
 p.s : I don't think that this is quite helpful -.-"